You probably don’t realize how small faults in wiring or fuel delivery can cascade into startup and running issues. We’ll walk through methodical checks—from insulation wear and loose terminations to fuel flow and sensor calibration—so you can pinpoint the root causes with controlled testing. If a simple fix isn’t enough, our next steps will show you how to verify codes, interlocks, and safe verification procedures, keeping you firmly on a reliable restoration path.
Key Takeaways
- Check electrical connections, insulation, and grounding to prevent intermittent faults and ensure reliable startup.
- Inspect the starter circuit, battery health, and ignition-related wiring for proper cranking and ignition timing.
- Verify fuel delivery and quality, including pump operation, line pressure, filters, and potential water contamination.
- Review control systems and sensors for calibration, firmware compatibility, and ECU fault codes indicating misfires or load changes.
- Assess mechanical health: compression, bearing wear, alignment, and vibration patterns to identify underlying mechanical faults.
Common Generator Faults: Root Causes at a Glance
Common generator faults rarely happen by chance; they reflect underlying design or operating issues. We approach root causes systematically, mapping faults to subsystem domains: electrical, mechanical, control, and fuel systems. In the electrical domain, insulation degradation, loose connections, and improper grounding undermine reliability, so we verify continuity, compliance, and torque on terminations. Mechanically, bearing wear, misalignment, and lubrication failures degrade performance and provoke vibration signatures that skew readings. Control-system faults arise from sensor drift, firmware mismatches, or unsafe interlocks, requiring calibration checks and version control. Fuel-system issues, including contaminated fuel, clogged filters, and improper air-fuel ratios, reduce efficiency and trigger alarms. Throughout, we emphasize generator maintenance and performance optimization as core practices, documenting findings, implementing corrective actions, and validating results with repeatable tests.
How to Diagnose Startup Hiccups Quickly
We’ll start with quick startup diagnostics to isolate the hiccup source and verify normal startup patterns. We’ll check fuel delivery, battery and starting circuit, and electronic control signals in a structured sequence to identify where the disruption occurs. If we detect an abnormal indication, we’ll apply the specific corrective steps for common startup hiccups and record the results for repeatability.
Quick Startup Diagnostics
If the generator struggles to start, begin with a rapid, structured check to isolate the fault. We approach quick startup diagnostics by confirming battery health first, then voltage at the starter circuit, and finally the integrity of the ignition coil connections. Next, verify fuel delivery: inspect line pressure, filter condition, and pump operation, noting any audible whines or delays. We assess compression only after these steps; abnormal readings point to mechanical wear. In cold start quirks, we log glow plug or choke behavior, ensuring proper activation timing and thermal response. We execute a controlled cranking sequence, recording RPM and ignition timing, and we compare against baseline startup profiles. Any deviation guides targeted checks without venturing into broad troubleshooting. Document findings for iterative refinement and prepare for deeper, subsystem-specific diagnostics if needed.
Common Startup Hiccups Resolution
Do startup hiccups typically betray a simple mismatch in fuel or electrical timing, or do they hint at a deeper interaction between subsystems? We approach this with a structured diagnostic sequence. Begin by confirming acceptable battery voltage and cranking speed, then verify fuel delivery pressure and injector operation. Record ignition timing reference, spark quality, and coil primary resistance to identify ignition hiccups. If compression remains within spec and air intake is unobstructed, inspect sensors for transient faults and verify ECU fault codes related to misfire or load changes. Use a controlled load sweep to observe response, logging RPM, voltage, and current excursions. Isolate the culprit by substituting known-good components and rechecking stability. This disciplined method minimizes ambiguity and reveals whether startup quirks are transient or indicative of a subsystem interaction.
Overheating: Causes, Symptoms, and Prevention
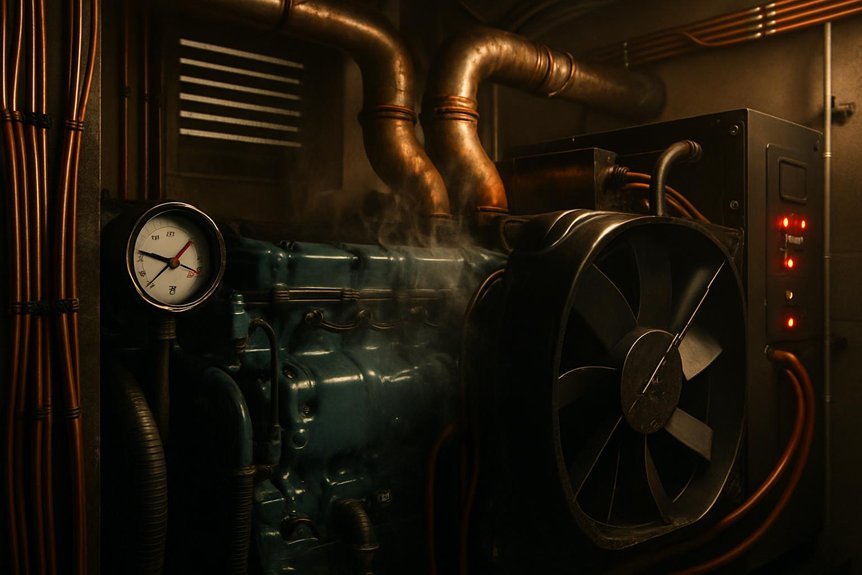
Overheating in a generator arises when heat production outpaces the cooling capacity, leading to elevated temperatures that can degrade components and reduce performance. We investigate root causes, identify symptoms, and outline prevention steps with precise, actionable guidance. By understanding generic heat generation sources and cooling system dynamics, we implement targeted interventions that maintain reliability and efficiency. Our approach emphasizes measurable checks, consistent maintenance intervals, and documentation to track trends over time. Importantly, we avoid speculative fixes and focus on verifiable conditions that threaten operation.
- Verify coolant levels and concentration; top off as needed and check for leaks.
- Inspect radiator/fins for obstructions and clean debris.
- Assess fan operation and belt tension; replace worn parts.
- Schedule regular cooling system maintenance and record findings for future reference.
Fuel System Faults: Stale Gas, Clogged Filters, and Flow Issues
We start by examining stale fuel effects, as degraded samples can reduce octane, cause varnish deposits, and impede injector spray. Next, we verify filters and flow paths, noting flow restrictions, pressure drops, and bypass symptoms to identify blockages or water contamination. Finally, we outline a precise check sequence for fuel quality, filtration integrity, and unobstructed flow to guide corrective actions.
Stale Fuel Effects
Stale fuel can cause a cascade of performance issues in a generator’s fuel system, from reduced octane and vapor-lock to clogging of filters and impaired flow. We approach this by identifying the root causes, evaluating storage conditions, and applying immediate remedies that restore reliability. We prioritize preventing recurrence through concise, repeatable steps that emphasize fuel stabilization and periodical maintenance. Our method is data-driven and repeatable, not anecdotal.
- Symptoms vs. causes: differentiate odor, color, and filter resistance
- Immediate action: drain, flush, and replace affected fuel and filters
- Verification: perform a controlled test run to confirm flow stability
- Prevention: implement stabilization protocols and seasonal storage checks
Filter and Flow Checks
In this section, we examine fuel-system symptoms and the steps to confirm proper flow: stale gas, clogged filters, and restricted lines. We describe a systematic approach to filter and flow checks that we apply consistently. Begin with a visual and tactile inspection of fuel hoses for cracks, leaks, and kinks, then verify fuel-filter condition and replacement intervals per manufacturer data. Measure fuel pressure at the pump inlet and after the filter to detect pressure drops indicating flow restriction. Inspect inline filters for sediment and bypass symptoms; replace when contamination is present. Assess idle stability during gradual throttle changes, and run a load test to observe noise reduction benefits from clean flow paths. Document findings for repeatability and future diagnostics.
Electrical Problems: Spark, Grounding, and Wiring Checks
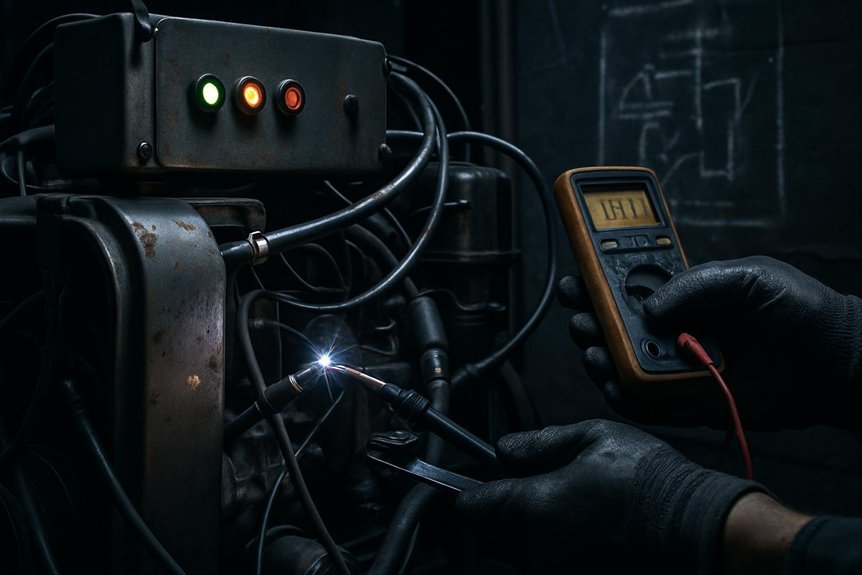
Before we explore in depth, are you encountering unexpected sparks, grounding faults, or erratic wiring in your generator? We outline a precise, methodical check process focused on electrical integrity, not battery topics. Our approach emphasizes spark inspection and grounding verification to locate faults quickly and safely.
- Visually inspect spark paths and ignition leads for wear, corrosion, or looseness
- Verify grounding continuity with a multimeter, ensuring low impedance to frame and earth
- Inspect wiring harnesses for insulation damage, chafing, or loose connectors
- Test for abnormal resistance or unexpected shorts using conservative, sequential steps
Battery and Charging System Troubleshooting
How do we quickly verify the battery and charging system are functioning correctly? We begin with a controlled key-on test, observe voltage at the battery terminals, and confirm stable alternator output within spec. Measure resting voltage, then start the engine and monitor voltage behavior during cranking; a healthy system maintains 12.6–12.8 V at rest and 13.8–14.5 V during run. Assess battery health by load testing and checking for excessive parasitic draw. Inspect connections for corrosion, tightness, and proper grounds. Track charging cycles to detect irregularities in recharge timing, which may indicate regulator or diode issues. Consider fuel additives only after the electrical path is secured, since start up cadence relies on clean, consistent electrical power for reliable ignition and smooth operation. Document findings and corrective steps.
Air and Cooling System: Intake, Exhaust, and Vent Blockages
Could intake and exhaust or vent blockages be silently compromising performance? Yes, they can impede cooling efficiency and trigger overheating, reducing continuous operation time. We examine air flow paths, focusing on air intake, ventilation exhaust, insulation clearance, and vented pathways to identify restrictive conditions. Blockages force the system to work harder, increasing wear and fuel or energy use. We document clearances, verify unobstructed ducts, and confirm that vents remain free of debris. Proactive attention to routing minimizes hot spot development and supports stable output.
- Check air intake and ventilation exhaust for debris and condensate
- Inspect insulation clearance around ducts and components
- Confirm vented pathways are unobstructed and properly oriented
- Verify return and exhaust routing maintains unobstructed, parallel flow
Safe Testing and Verification Procedures
Are testing and verification procedures reliable when performed methodically and safely, or do gaps in method introduce risk? We approach safe testing with a defined sequence, documenting each step for traceability. We begin with circuit isolation, followed by sensor checks and load testing within rated parameters. Verification procedures require calibrated instruments, replicable conditions, and recorded tolerances to confirm performance. We use periodic functional tests to validate safety interlocks, alarms, and fuel-quality controls, ensuring no latent faults remain. Safe testing emphasizes controlled environments, protective gear, and clear abort criteria if anomalies arise. We compare measured outputs to manufacturer specifications, analyzing deviations promptly. Documentation captures results, corrective actions, and next validation dates, reinforcing reliability. Through rigorous safe testing and verification procedures, confidence in generator readiness and fault resilience is sustained.
Prioritizing Repairs: When to DIY vs. Call a Pro
When should we tackle generator repairs ourselves, and when is it wiser to call a professional? We prioritize repairs by evaluating risk, complexity, and tools. If symptoms are minor, reproducible, and within our maintenance mindset, we handle safe, documented steps and verify after each action. If issues affect fuel system, electrical controls, or outputs, we escalate to a pro to preserve principle safety and system reliability. We balance downtime costs against risk of fire, shock, or carbon monoxide exposure. Documentation, correct torque, and tested resets guide our approach. For readers, consider these hooks:
We balance DIY fixes with risk, complexity, and tools, escalating to pros for fuel, electrical, or output issues.
- Assess training and tool access before starting any repair
- Distinguish routine maintenance from diagnostic failures
- Allocate time for safety checks and testing
- Seek professional help for uncertain or high-risk tasks
Frequently Asked Questions
How Often Should I Replace Generator Maintenance Fluids?
We replace maintenance fluids every 100 hours or annually, whichever comes first, following manufacturer specs. We assess fluids type compatibility during each service, document changes, and guarantee proper disposal. This guarantees reliable operation and accurate maintenance fluids replacement frequency.
What Cords and Outlets Are Safe for Generator Use?
We’ll start with irony: yes, cords and outlets are “just cords,” right—except cord safety and outlet compatibility matter immensely. We ensure only approved cords, weather-rated, and compatible outlets, follows our methodical, technical safety checks for you.
Can I Run a Generator Indoors for Short Periods?
We don’t recommend indoor operation; we avoid it due to carbon monoxide risks. If you must, follow ventilation guidelines precisely, use outdoor exhaust, and monitor air quality continuously. We’ll prioritize safety and compliance in every step.
How Long to Wait After Fueling Before Starting Again?
We wait at least five minutes after fueling before starting again, to allow vapors to vent; this prevents startup hesitation and ensures safe fueling timing. We follow precise procedures, noting fueling timing and verifying no heat buildup.
What Are Common Signs of a Bad Spark Plug Gap?
We notice the gap signs of a bad spark plug usually include hard starting, misfires, and reduced fuel efficiency. We’ll inspect spark plug gap, measure precisely, adjust or replace as needed; this improves overall fuel efficiency and performance.
Conclusion
We’ve walked through common generator faults, from electrical gremlins to fuel-delivery quirks, and tied each symptom to its root cause. If a theory says “it’s just a spark issue,” we test ignition circuits, measure currents, and verify codes to confirm or refute it. By documenting steps, respecting safety interlocks, and prioritizing repairs, we paint a precise, test-driven picture: diagnose, verify, and restore reliability with controlled, repeatable methods.

